
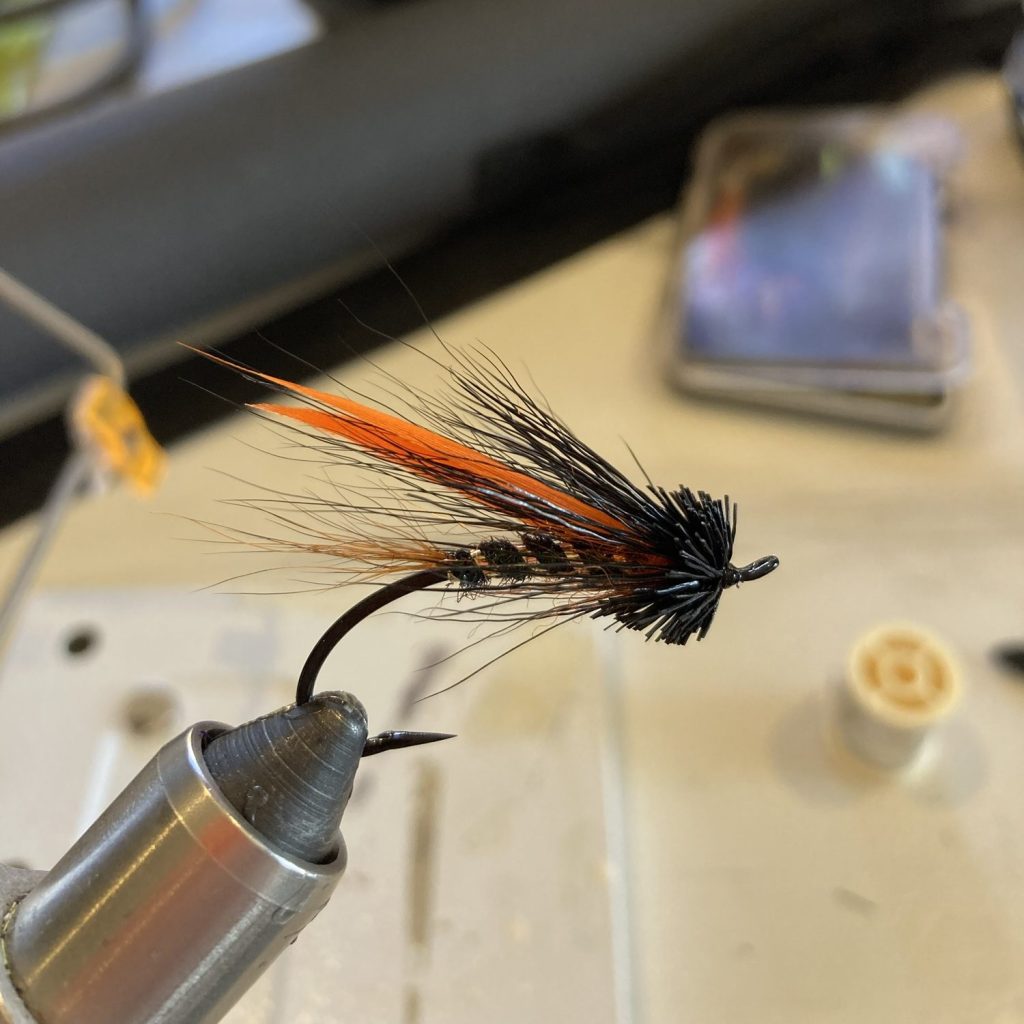
It’s my favorite fly to tie—by a long shot. From the sweeping hackles and layered wings of an old-school Dee fly to a bushy muddler head, there is something enchanting about the simplicity of the classic steelhead wet fly. But the simplicity of the recipe demands superior technique to ensure the fly retains proper proportions. There is a profound difference between a tail that is too long and one that seems intentionally oversized. In this post, I’ll lay out the process behind my lifetime pursuit of excellence in tying wet flies for steelhead.
A History Primer
If you’re a fly fishing history nerd like me, then you need a copy of Spey Flies: Their History and Construction by John Shewey. The book describes the rich and storied history of swinging flies for steelhead and Atlantic salmon and does a better job outlining proper wet fly tying technique than any book I’ve ever read. Start here if you want to go deep.
At a high level, these flies were developed during the Victorian era by fishermen using long rods—sometimes 15 feet or greater—when fishing for Atlantic salmon on the River Spey in Scotland. A sport for the affluent and influential, these flies featured feathers and furs harvested from animals found on hunting estates. The flies were characterized by long-shanked hooks, flowing hackles, and low-set wings of mallard flank.
As the empire expanded, so did the breadth of tying materials. Dee flies were popularized on a river called the Royal Dee and highlighted the use of exotic materials such as jungle cock and flowing heron hackles. When one pictures the gaudy salmon flies of old, it is these ornate Dee flies that come to mind.
Modern tyers such as Brian Silvey built on the history of these classic flies and brought them into the contemporary style many of us tie today. Hairwings and wing sets made from hackles are truly modern inventions that diverge from the classic style while staying true to the roots of the craft. Now, “Spey flies” and “wet flies” are generalized terms that describe any fly designed to swing for salmon or steelhead and tied on an upturned-eye hook.
What Makes for Great Proportion?
Excellent proportions are developed by regularly tying these masterpieces. Over time, you’ll develop an intuition for balance through rigorous practice. These bullet points are a jumping-off point and work for a variety of materials. For example, when I tie a muddler, I size my elk or deer hair to be no more than an entire hook length. If I want to feature an underwing material, I’ll downsize my deer or elk hair slightly to let the underwing shine.
I’ll spare you the long explanation and give you some simple bullet points instead:
- Tail = ½ to ⅓ hook shank length
- Body = to the hook point
- Rib = 4–5 turns
- Wing = to the end of the hook or slightly past, no wider than ¾ of the hook gap
- Hackle/Throat = long enough to reach the hook point
Tips for Achieving Excellent Proportions
Number One: Slow down.
Rushing through your fly results in uneven thread wraps, unwanted bumps, and materials that are just slightly off in length. Slowing down and letting every thread wrap count is the best thing you can do to enhance the quality of your wet flies. Simple ties demand greater precision.
Number Two: Select and measure your materials before you begin tying.
I like to sort and select my materials and lay them out on the bench. With the bare hook in the vise, I measure out my wing length, select my flanks, and measure my throat hackle while there isn’t any clutter on the hook to confuse me. This method is especially helpful if you’re tying a large batch of a particular pattern.
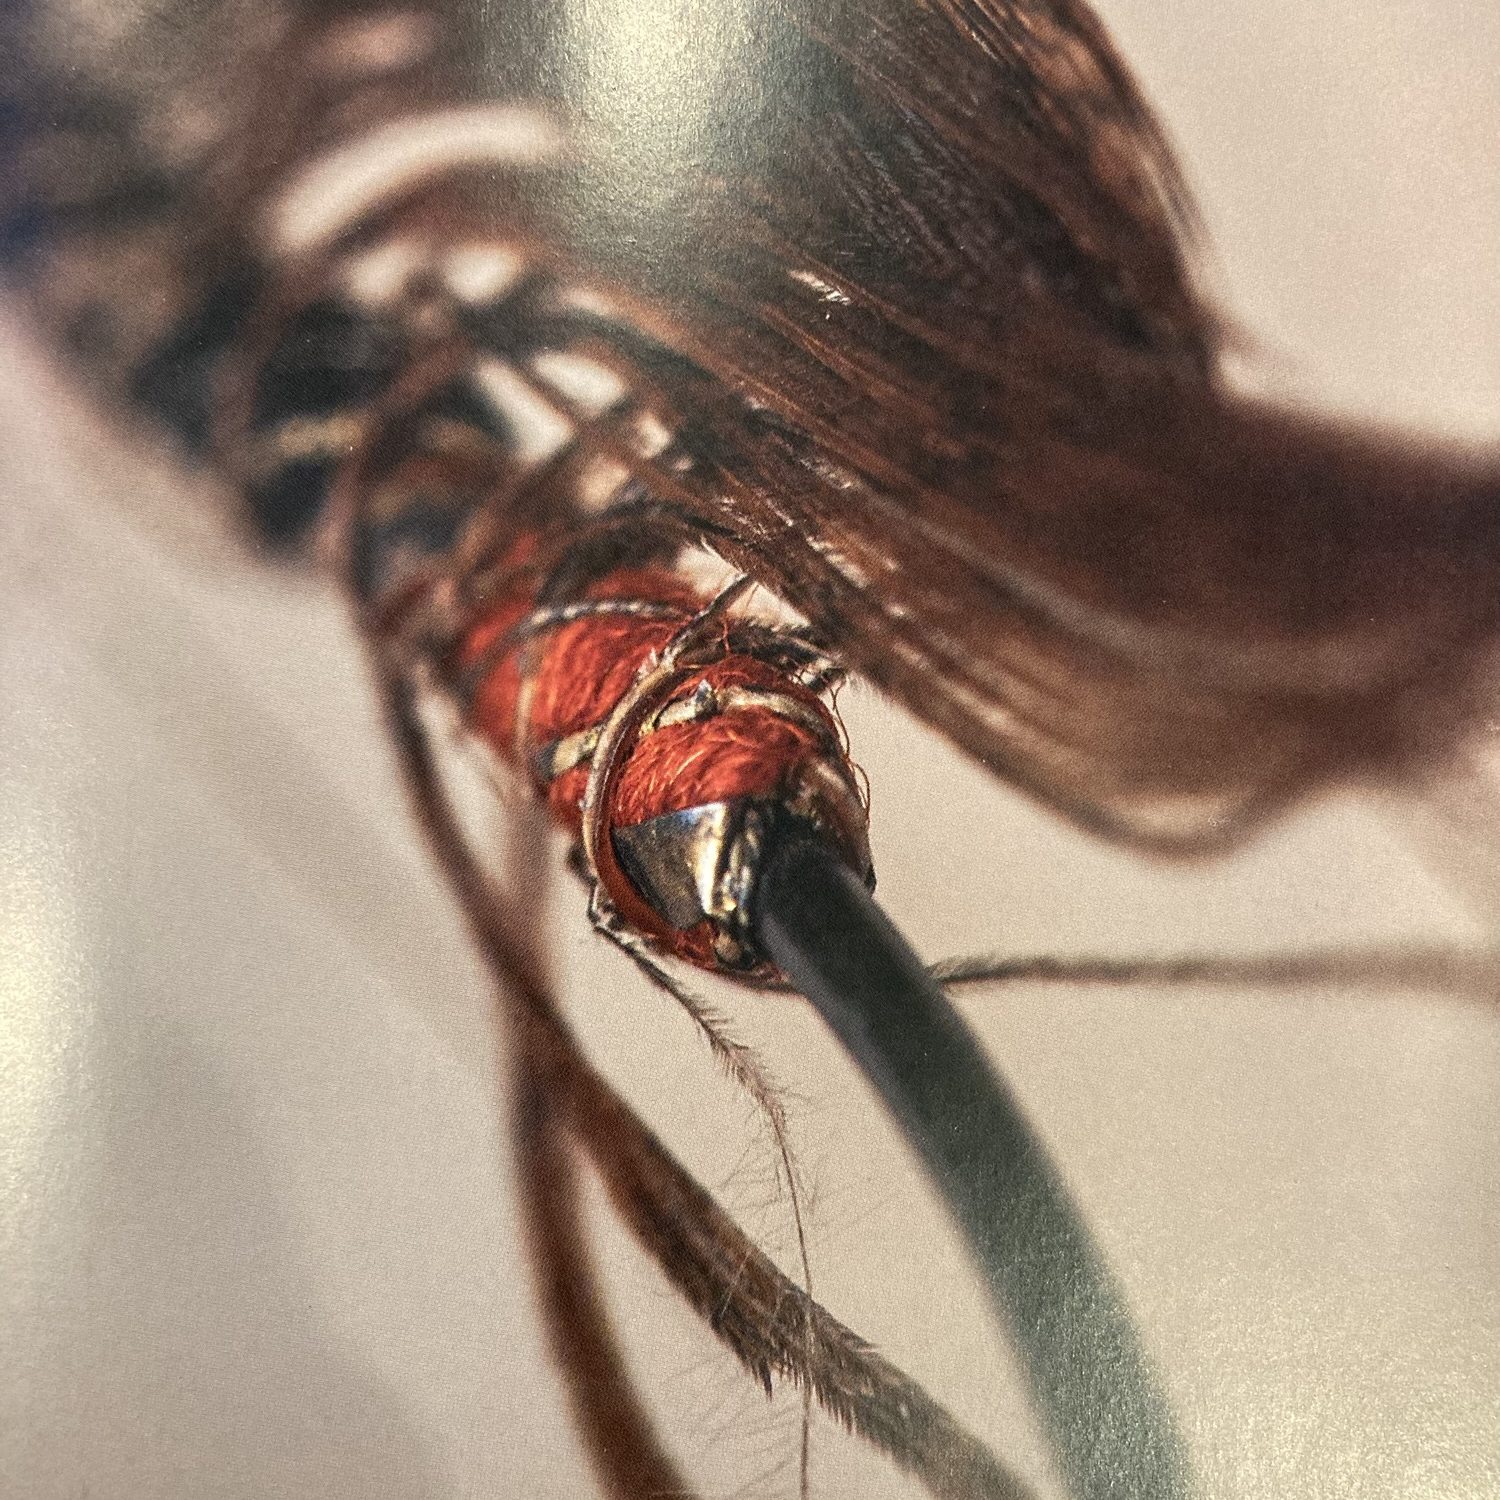
Number Three: Stay organized on the hook—specifically at the back.
Many Spey flies employ two or three different ribs in addition to a hackle feather. Since it can get crowded at the back of the hook, I like to tie in stations around the hook. For example, if I have three different ribs and a hackle feather, I’ll divide the hook into quarters at the rear. One material on top, two on opposite sides, and the final one at the bottom. Adjust the method to suit how many materials you’re adding. To check your technique, simply look down the back of the hook toward the eye: your materials should create a neat spiral rather than appearing lumped and stacked on top of each other.
Number Four: Create an even body.
It’s easy to accidentally create a bump in the body of the fly, especially if your body is floss. Besides a keen eye, it helps to spin your bobbin every few wraps to let the thread flatten out. After I tie in my materials and advance my thread toward the eye, I go one step further and burnish the thread wraps before adding floss, dubbing, or ribbing. Simply take a smooth, rounded tool—like the handle of your whip finisher—and rub back and forth along your thread wraps. Do this around the entire body of the fly. The result is a smooth, flat body with any tiny imperfections evened out.
Number Five: Don’t crowd the eye.
I am especially guilty of this cardinal wet fly sin. When you crowd the eye of the hook, you make it incredibly difficult to finish the fly with a small, tight, intentional head. Staying just a hair farther back—usually about an eye length—gives you sufficient space to cover minor errors and build a clean, whip-finished base that absorbs a perfect bead of head cement. You’ve put in tons of effort to get to this point—don’t blow it in the final stage.
Wrapping Up
Spey and Dee flies are simple at their core and leave every thread wrap exposed. As tiers, we need to be extra disciplined to ensure our proportions turn out properly once the final whip finish is laid down. A few simple adjustments—slowing down, staying organized on the hook, and using proper technique to create a smooth body—make all the difference.
With these tips in hand, get creative and tie in whatever materials your heart desires. As long as the proportions come out right, your fly will look like a million bucks. It might not impress a waiting steelhead—but it will definitely impress your friends.Keep those wraps tight.
– T

Leave a comment