Blog

  • Fly Tying Materials Explained: Choosing the Right Feathers for Your Flies

    Tom Whiting posing with one of his prized birds bred for fly tying feathers. Notice the cape around the neck and the copper-colored saddle.

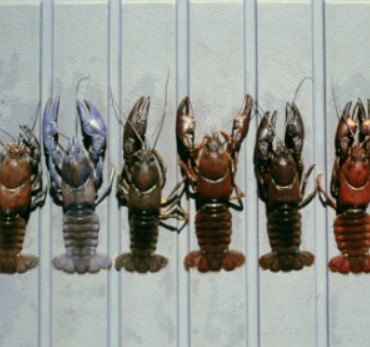
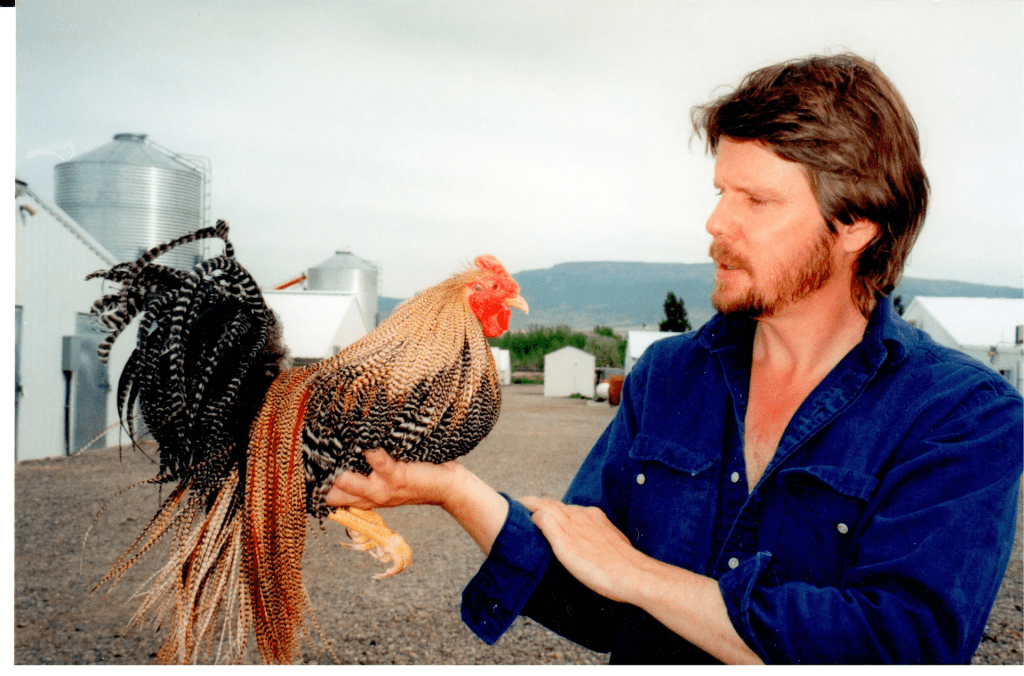
    Genetic hackle breeding by Whiting, Metz, Keough, and their predecessors has given fly tyers the gift of perfect feathers—albeit at a steep price. There is no doubt that you get what you pay for when you pick that $100 rooster saddle off the rack at the local fly shop. However, we are definitely spoiled for choice when it comes to feather selection, often at the cost of our sanity. There are too many options on the shelves, and it’s easy to get lost in the noise. I know I do. Hopefully, I can lend some insight into the purpose each category of pelt serves.

    Please note that I am only covering chicken pelts. The list of gamebirds and waterfowl available to fly tyers is exhaustive and would involve writing a book on genetic feather breeding—an ordeal I am not willing to undertake. Enjoy this simple guide written by a simple guy.

    A Word on Semantics

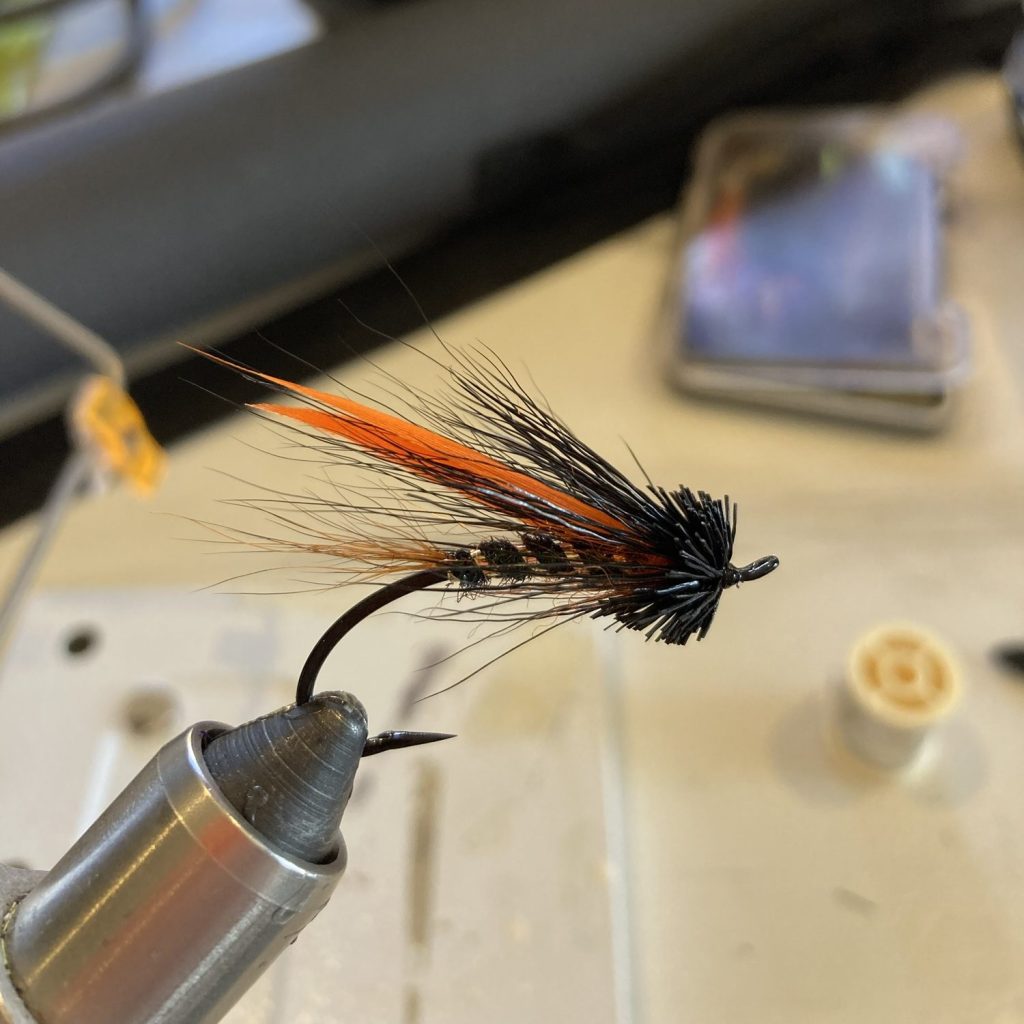
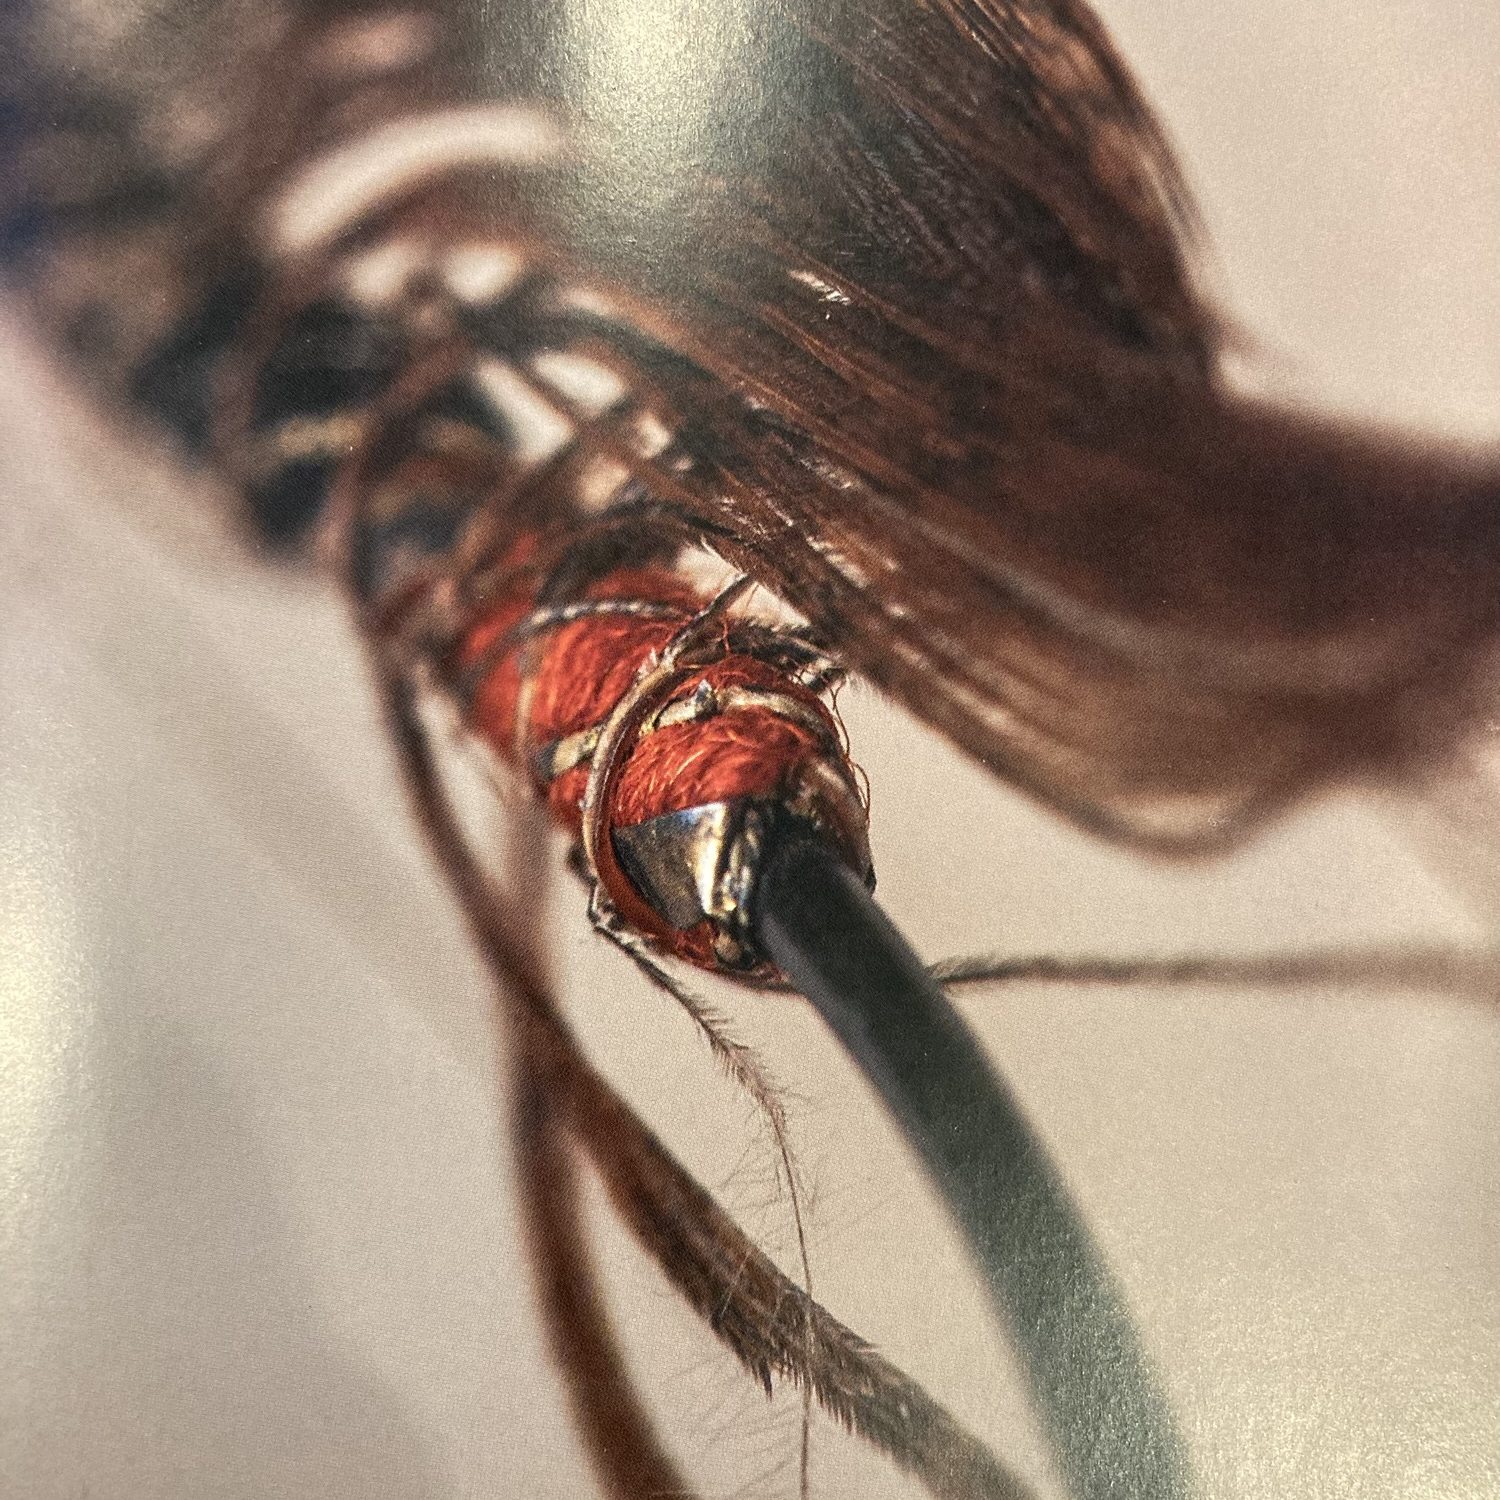
    Capes come from the bird’s neck and are often referred to as necks, depending on the manufacturer. Saddles come from the portion of the back closest to the tail. If you visualize where a saddle is placed on a horse, you’re on the right track. Spey hackle comes from the rearmost portion of the saddle, where it joins the tail. Spade hackle comes from where the neck meets the saddle.

    Rooster Saddles

    Rooster saddles have long been prized for their use in dry flies. Selective breeding over many decades has yielded long, narrow feathers suitable for even the smallest dry flies, depending on the grade. Higher grades are longer, more uniform, and tend to have narrow tapers. Rooster saddles bred for dry flies also feature dense barbs to increase fiber density per wrap.

    When buying saddles, note that the feathers tend to be fairly uniform in size, usually spanning only three sizes of dry fly. You’ll need to be certain of the size you’re purchasing and plan on tying hundreds of the same size flies for years to come. For many, this isn’t an issue. For the economical tyer, I’d generally steer clear. Non-commercial tyers are often better served buying saddles by the half-saddle.

    Rooster Capes/Necks

    Rooster capes are very versatile for the budget tyer. One cape can yield hundreds of feathers suitable for dry flies ranging from sizes 6–22 while also providing excellent material for streamer patterns. In fact, the more rounded profile of cape feathers has proven its worth as a premier choice for streamer tyers in both fresh and saltwater. The stems are strong and less likely to break when chomped by a big, toothy fish.

    Rooster capes have stiffer fibers than hen capes. They work great when palmered on flies intended for bigger, pushier water. The spade hackle at the bottom of the cape especially resists current that would collapse fibers on most flies. They also do a decent job propping up softer materials such as ostrich or marabou.

    Hen Saddles

    Hen saddles feature long, large feathers with rounded tips. These feathers are much softer than rooster saddle hackle and give flies a full, lifelike appearance. Because of their size and flowy texture, they make excellent collars for steelhead and salmon wet flies. However, like rooster saddles, they have limited size variation, so choose a saddle that fits most of the flies you plan to tie. I’ve noticed that these feathers can be on the webby side depending on their location on the saddle.
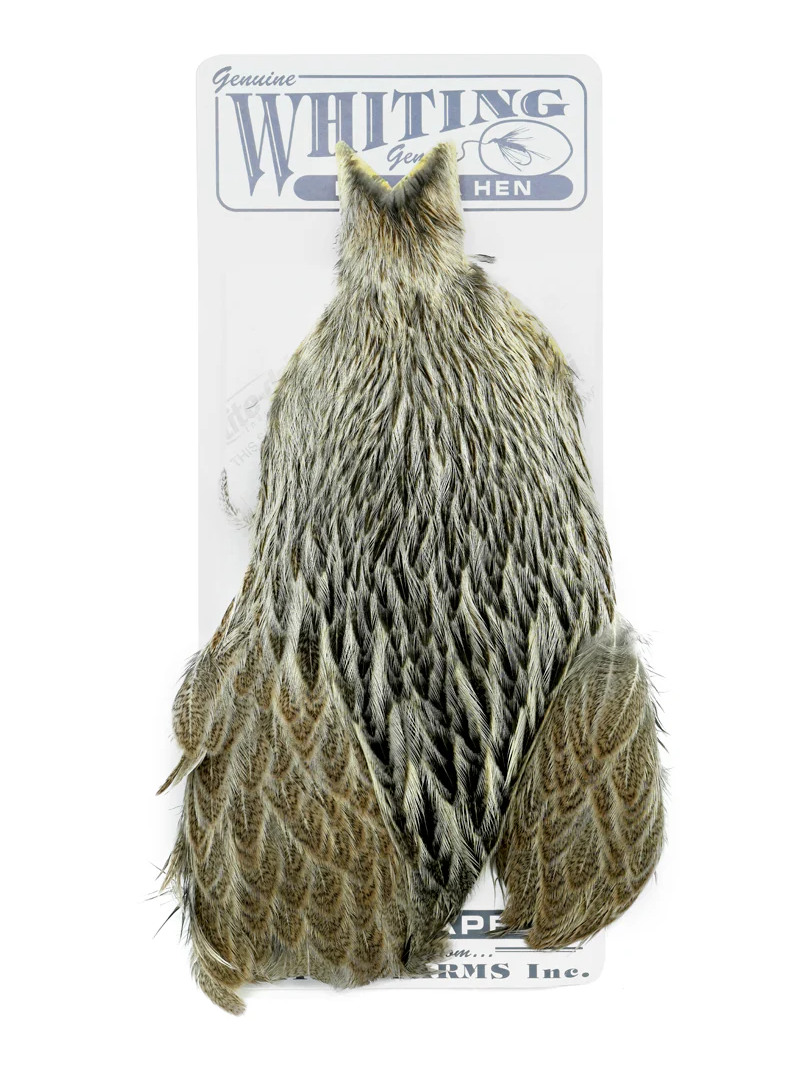
    Hen Capes/Necks

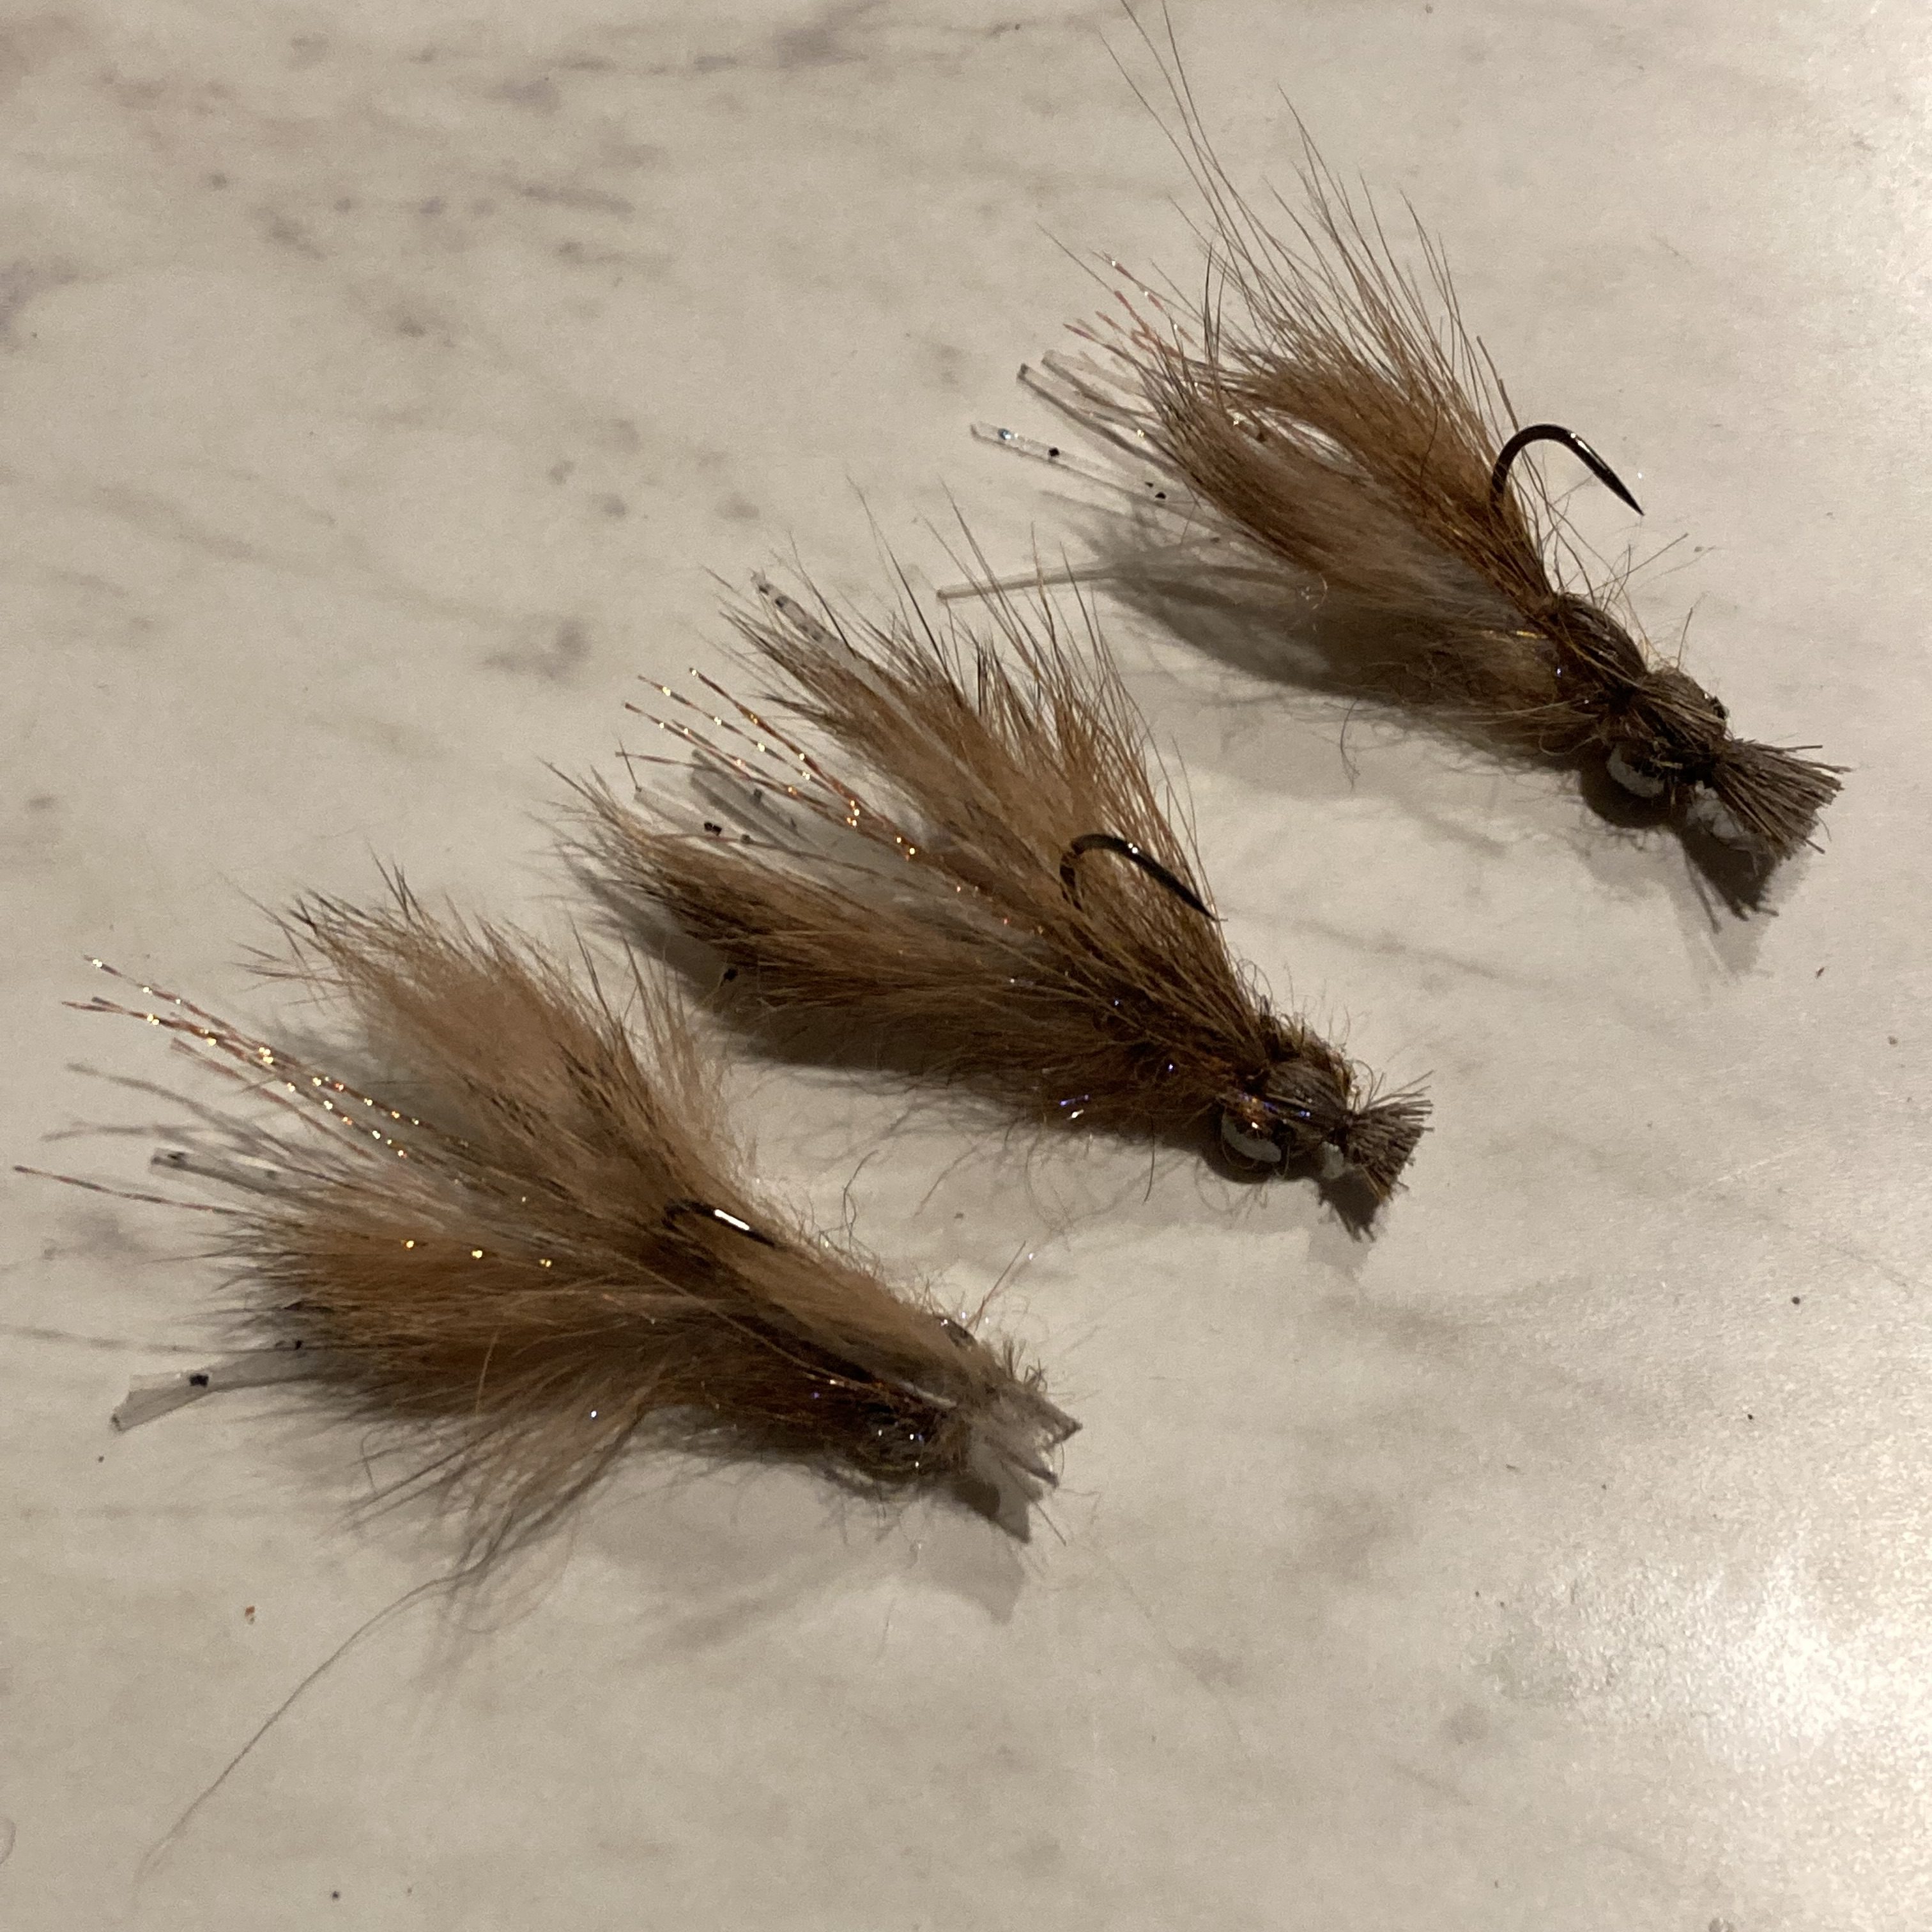
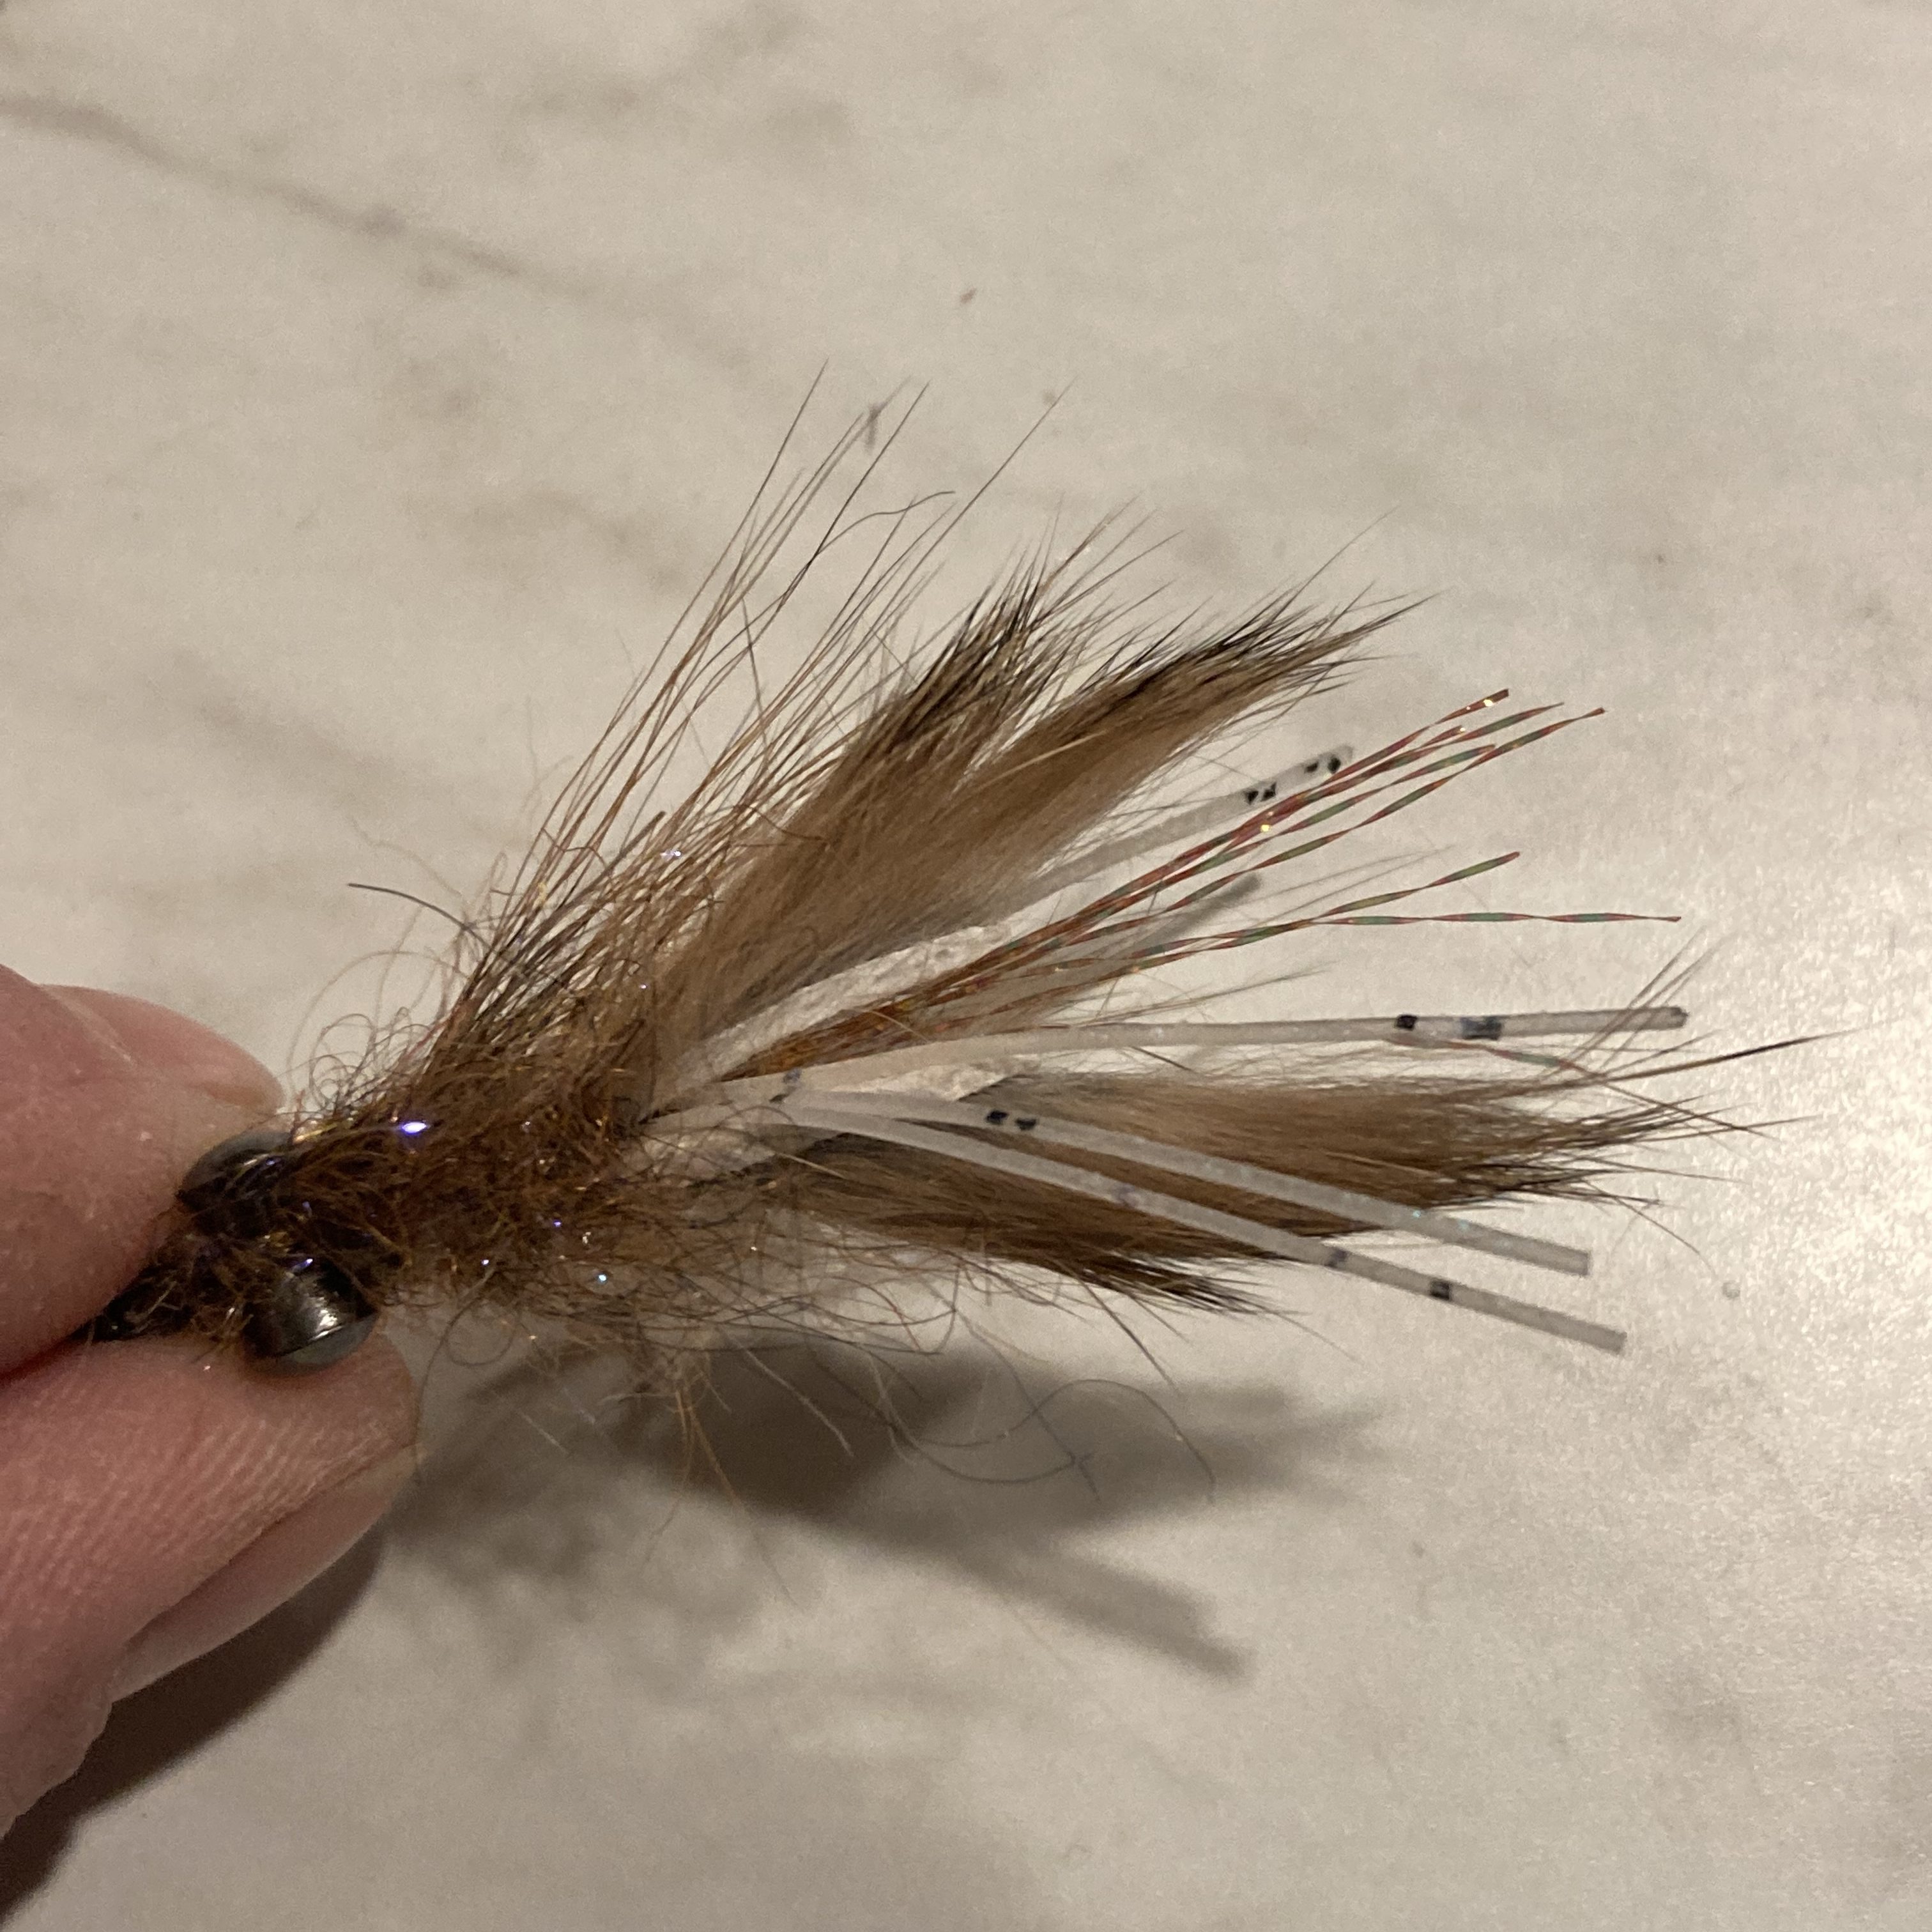
    Hen capes offer long, narrow, soft feathers with a wide range of sizes, making them extremely versatile. Smaller feathers work well for hackled collars on small wet flies and nymphs. The soft tips of the narrowest feathers are ideal for feather-winged dry flies. Longer feathers are well suited for streamers with flowing freshwater tails. This may be the best choice for the budget tyer looking to maximize value from their first full skin.

    Hen cape fibers are soft and supple, making them best suited for slower water. Fast, pushy Western rivers will collapse the fibers along the body of the fly, so fish them in softer seams and slower runs to maximize their pulsating effect.

    Whiting Rooster Soft Hackle with Chickabou

    Deciphering the Patterns

    Let’s keep this simple:

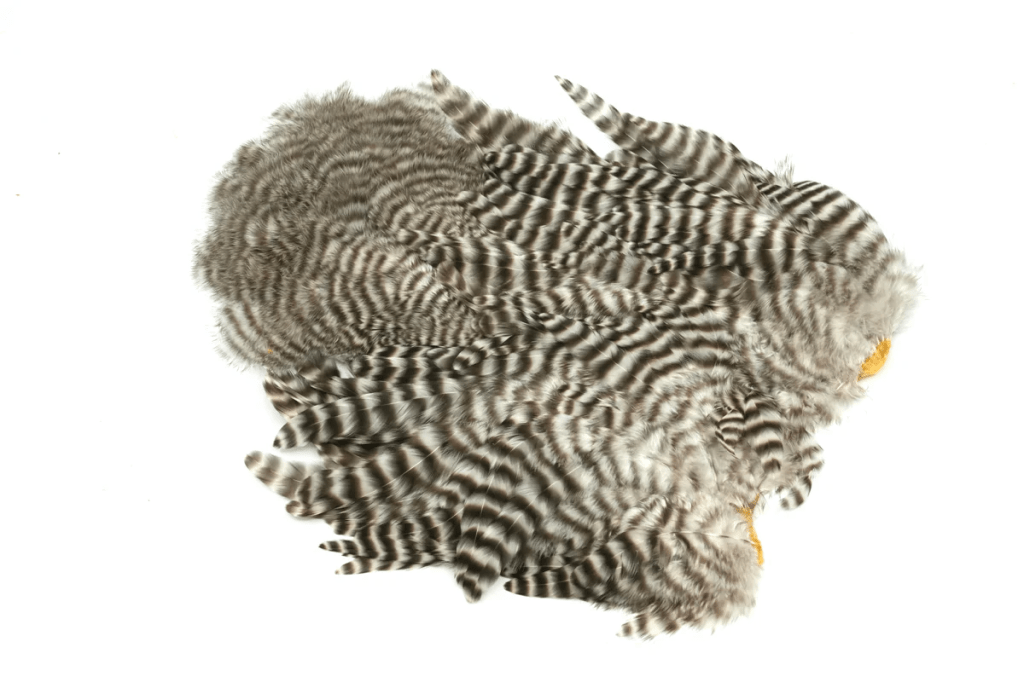
    • Barring = black stripes on the feather
    • Grizzly = barred black and white (often dyed various colors, such as chartreuse)
    • Speckling/Mottling = fine dark markings distributed throughout the feather
    • Badger = a dark line running the length of the feather
    • Variant = colors and patterns vary throughout the pelt
    Whiting Brahma Hen Cape in Badger. Cream colored.

    A Couple of Lingering Feather Types

    You may also find a few specialty feathers on a pelt:

    • Marabou = fluffy, flowing feathers with a relatively thick stem; commonly used for tails and full collars
    • Chickabou = smaller, finer, more delicate marabou
    • Schlappen = very webby hackle whose fibers tend to clump rather than distribute evenly when palmered

    So, What Should I Buy?

    The average tyer should invest in high-quality rooster and hen capes. Saddles tend to serve more specific purposes and sizes, so I’d avoid them if versatility is your goal. A well-rounded collection might include several cape colors in a variety of patterns.

    Buying white pelts in different patterns allows you to dye your own feathers and save money. I haven’t tried it myself yet, but it sounds like a fun future article. At the end of the day, your pelt collection should reflect your tying style and the flies you enjoy most. If you tie size 18 PMDs all day, then get the rooster saddle that fits the job. For the rest of us, start collecting capes.That’s all for now.
    – T

  • 5 Tips: How To Tie Better Wet Flies for Steelhead

    Flies like this sparse Charlie Muddler I tied up demonstrate solid proportion, except for the slightly elongated underwings. But the fish shouldn’t care.

    It’s my favorite fly to tie—by a long shot. From the sweeping hackles and layered wings of an old-school Dee fly to a bushy muddler head, there is something enchanting about the simplicity of the classic steelhead wet fly. But the simplicity of the recipe demands superior technique to ensure the fly retains proper proportions. There is a profound difference between a tail that is too long and one that seems intentionally oversized. In this post, I’ll lay out the process behind my lifetime pursuit of excellence in tying wet flies for steelhead.

    A History Primer

    If you’re a fly fishing history nerd like me, then you need a copy of Spey Flies: Their History and Construction by John Shewey. The book describes the rich and storied history of swinging flies for steelhead and Atlantic salmon and does a better job outlining proper wet fly tying technique than any book I’ve ever read. Start here if you want to go deep.

    At a high level, these flies were developed during the Victorian era by fishermen using long rods—sometimes 15 feet or greater—when fishing for Atlantic salmon on the River Spey in Scotland. A sport for the affluent and influential, these flies featured feathers and furs harvested from animals found on hunting estates. The flies were characterized by long-shanked hooks, flowing hackles, and low-set wings of mallard flank.

    As the empire expanded, so did the breadth of tying materials. Dee flies were popularized on a river called the Royal Dee and highlighted the use of exotic materials such as jungle cock and flowing heron hackles. When one pictures the gaudy salmon flies of old, it is these ornate Dee flies that come to mind.

    Modern tyers such as Brian Silvey built on the history of these classic flies and brought them into the contemporary style many of us tie today. Hairwings and wing sets made from hackles are truly modern inventions that diverge from the classic style while staying true to the roots of the craft. Now, “Spey flies” and “wet flies” are generalized terms that describe any fly designed to swing for salmon or steelhead and tied on an upturned-eye hook.

    What Makes for Great Proportion?

    Excellent proportions are developed by regularly tying these masterpieces. Over time, you’ll develop an intuition for balance through rigorous practice. These bullet points are a jumping-off point and work for a variety of materials. For example, when I tie a muddler, I size my elk or deer hair to be no more than an entire hook length. If I want to feature an underwing material, I’ll downsize my deer or elk hair slightly to let the underwing shine.

    I’ll spare you the long explanation and give you some simple bullet points instead:

    • Tail = ½ to ⅓ hook shank length
    • Body = to the hook point
    • Rib = 4–5 turns
    • Wing = to the end of the hook or slightly past, no wider than ¾ of the hook gap
    • Hackle/Throat = long enough to reach the hook point
    This photo is taken from my copy of John Shewey’s Spey Flies: Their History and Construction. Notice how the ribbing is tied in stations around the hook bend and flows neatly up the shank towards the eye.

    Tips for Achieving Excellent Proportions

    Number One: Slow down.
    Rushing through your fly results in uneven thread wraps, unwanted bumps, and materials that are just slightly off in length. Slowing down and letting every thread wrap count is the best thing you can do to enhance the quality of your wet flies. Simple ties demand greater precision.

    Number Two: Select and measure your materials before you begin tying.
    I like to sort and select my materials and lay them out on the bench. With the bare hook in the vise, I measure out my wing length, select my flanks, and measure my throat hackle while there isn’t any clutter on the hook to confuse me. This method is especially helpful if you’re tying a large batch of a particular pattern.

    Number Three: Stay organized on the hook—specifically at the back.
    Many Spey flies employ two or three different ribs in addition to a hackle feather. Since it can get crowded at the back of the hook, I like to tie in stations around the hook. For example, if I have three different ribs and a hackle feather, I’ll divide the hook into quarters at the rear. One material on top, two on opposite sides, and the final one at the bottom. Adjust the method to suit how many materials you’re adding. To check your technique, simply look down the back of the hook toward the eye: your materials should create a neat spiral rather than appearing lumped and stacked on top of each other.

    Number Four: Create an even body.
    It’s easy to accidentally create a bump in the body of the fly, especially if your body is floss. Besides a keen eye, it helps to spin your bobbin every few wraps to let the thread flatten out. After I tie in my materials and advance my thread toward the eye, I go one step further and burnish the thread wraps before adding floss, dubbing, or ribbing. Simply take a smooth, rounded tool—like the handle of your whip finisher—and rub back and forth along your thread wraps. Do this around the entire body of the fly. The result is a smooth, flat body with any tiny imperfections evened out.

    Number Five: Don’t crowd the eye.
    I am especially guilty of this cardinal wet fly sin. When you crowd the eye of the hook, you make it incredibly difficult to finish the fly with a small, tight, intentional head. Staying just a hair farther back—usually about an eye length—gives you sufficient space to cover minor errors and build a clean, whip-finished base that absorbs a perfect bead of head cement. You’ve put in tons of effort to get to this point—don’t blow it in the final stage.

    Wrapping Up

    Spey and Dee flies are simple at their core and leave every thread wrap exposed. As tiers, we need to be extra disciplined to ensure our proportions turn out properly once the final whip finish is laid down. A few simple adjustments—slowing down, staying organized on the hook, and using proper technique to create a smooth body—make all the difference.

    With these tips in hand, get creative and tie in whatever materials your heart desires. As long as the proportions come out right, your fly will look like a million bucks. It might not impress a waiting steelhead—but it will definitely impress your friends.Keep those wraps tight.
    – T

  • Call Me Crawdaddy: The Case for Crayfish Flies for Trout

    Three different versions of crayfish flies that I will test out this spring. Hopefully a clear winner emerges!

    I’ve been in a fly-tying mood lately. Since it’s still dark when I get home from work, it’s about the only thing I can do besides cook a delicious meal and binge Stranger Things. The tying state of mind gets me thinking about what flies I could be using this coming season that I just haven’t given enough love to in the past—or maybe new ones that could become fly box staples. Whatever the case, it’s exciting to get wound up in a fresh pattern and all of its iterations. This was exactly my experience with crayfish patterns the other night.

    An Ode to the Crayfish

    Crayfish, crawdad, mudbug—whatever you call them—it’s the freshwater crustacean that doesn’t get anywhere near enough love in our fly boxes. Mine included. They start out small in the spring and, through a series of molts, grow to full size with a tough exterior carapace. They take about three to four months to reach adult size and then remain adults for the next several years.

    I have a theory that trout tend to key in on these lobster-like creatures just after they molt—specifically during the three to four months it takes them to reach adulthood. The hard shell is shed and, for a brief window, the crayfish is soft and edible. They aren’t as large of a meal, but they’re vulnerable targets. The smaller crayfish also lack the big, angry claws that the adults have.

    It’s a pretty easy tie: some flash, a few rubber legs, a couple rabbit strip claws, and a simi-seal dubbing loop body. Tack on some dumbbell eyes and your carapace of choice (deer hair, pieces of plastic, or strips of fur are all good candidates).

    How to Mimic Them

    There are over 600 different species of crayfish, ranging in size from just under an inch to full-on lobster size, so it’s important to know what’s living in your home waters. Colors range from olive to red, orange, blue, and brown.

    That means your patterns should be tailored to the local species. One thing you can be fairly confident in is that molting crayfish are lighter in color after shedding their shell, which is why I’m keying in on tan flies. I don’t know this for certain, but I believe they’ll stand out a bit more as vulnerable bugs hanging out close to the weed beds.

    Tie these flies on jig hooks with fairly heavy weight. Keep them on the smaller side of your full-sized local crayfish species and stick to lighter colors. The key detail that sells the pattern is the claws. Many tiers will tie up big, gaudy, beautiful claws that are likely to give a hungry trout second thoughts. I personally wouldn’t want to eat something with massive claws waiting to pinch my nose. Tie them smaller than you’d expect and facing toward the rear of the hook. I also like to add rubber legs, long pieces of flash, and fuzzy dubbing to give the appearance of legs and antennae.

    How to Fish Them

    These bugs are best fished near weed beds, drop-offs, shelves, and other major structure. Since crayfish are most likely hiding in the shallower parts of the river, it pays to focus your efforts there.

    Cast the fly, let it sink, then jig your rod tip in an up-and-down motion using a slow, gentle cadence. The objective is to mimic a bug fleeing in small, subtle bursts with an undulating motion. A properly weighted jig-style fly should help achieve this retrieve.

    The many iterations of the Signal Crayfish. This species is commonly found in the Deschutes River and Lake Billy Chinook. Note the sheer color variety.

    Give Them a Shot

    Join me in making 2026 the year of the crawdad. It’s an underused and underloved fly that deserves more attention—myself included. They don’t need to be super difficult or painstaking to tie in order to be effective. Just wrap up the bug, tie it onto your leader, and give it a try. It’s the only way to know for sure if it works in your home waters. Just be sure to do your homework on the species that live there.

    Get after it.
    —T

  • How to Read Steelhead Holding Water: A Simple Guide for Swinging Success

    This wild hen was hiding in a depression on a mixed-substrate run. The washboard effect on the water’s surface gave away the structure.

    It’s easy for a steelhead angler to get caught up in the buzz: Which fly do I use? Is pink hotter than purple today? Do I need to slow down the lift before sweeping into my cast? Maybe it’s just the barometric pressure. We’re all tangled between fly selection and dialing in the perfect cast — but there’s more to it.

    The greatest steelhead anglers recognize that the ability to read water is what sets them apart from 95% of fly fishers. The simplest explanation for why the rest of us don’t catch fish is pretty straightforward: we aren’t casting where the fish are. And while steelhead are technically trout, their behavior is anything but trouty. If we want to shake hands with one, we need to get inside their heads and think a little differently.


    Steelhead Are Built Different

    Though they spend their first couple of years living like resident trout, those trouty habits fade quickly. After growing up in their home streams, steelhead make the long journey to the ocean, where they fatten up while dodging constant pressure from big, bad predators. Only a small percentage—around 5–10% of smolts—survive long enough to return. Those that do are battle-hardened and much smarter than your average trout.

    Once they migrate back to freshwater, their behavior changes dramatically. For one, they have very few threats as the biggest fish in the river, aside from a prowling grizzly or a lowlife poacher. Running chinook salmon will put steelhead off the bite but still, they’re cautious. Beyond the occasional exuberant surface breach, they move like ghosts — conditioned to self-preserve after thousands of years of evolution.

    Steelhead also aren’t in the river to eat. Their sole mission is to get upstream as quickly as possible, spawn, and return to the salt. They enter freshwater as heavyweights and slowly slim down the longer they’re in the system. Because they’re not feeding, they stick to dedicated travel lanes — underwater highways — and stop only when they need to rest in holding water. They must conserve energy to complete the journey to their spawning tributaries.

    Travel lanes and holding spots become obvious the more time you spend staring at the river. I like to ask myself: What route would I take if I were swimming upstream? Suddenly, pockets of slack water, even current, and tighter bank seams start to reveal themselves. It pays to focus your casts on pockets that sit along or adjacent to these travel lanes.


    This wild buck was hiding on a shelf just before a long gravel bar and 40 feet below a rapid. The rapid plunges into a bucket with plenty of structure. I’ve found fish nosed into the rapid before.

    So, Where Are They Hiding?

    It’s a cop-out answer, but…it depends.

    The type of water we want is soft, but still moving at about a walking pace. It should be even, not churning. And while the surface gives clues about current speed, what’s happening beneath can be slightly different. Since steelhead generally prefer 4–6 feet of holding depth, you can assume underwater structure — boulders, shelves, drop-offs — is slowing the current below. That alone narrows the search considerably.

    Mornings and evenings often offer the best chance at a handshake. Since steelhead tend to travel under cover of darkness, we target them most effectively when they’re still active at the end of a night of moving. Tailouts and the heads of rapids are consistent producers.

    Tailouts are ideal because the river shelves upward before dumping into a rapid. It’s the first slow water a steelhead encounters after charging through whitewater, and it’s easy for an angler to identify. Fish may rest there for hours before continuing upriver. Tailouts are also a pleasure to fish — perfect for dries, muddlers, and skaters. Look for slow water in the tailout that creates a gentle, washboard-like texture on the surface. That’s a dead giveaway for holding structure.

    Rapid heads are trickier. Fish might be nosed right into the pocket at the lip of the rapid, and the only way to reach them is to sink your fly quickly and keep it in the zone long enough for them to notice. A better bet, in my opinion, is to target the first major piece of structure below the rapid — the spot where current begins to even out. I’ll fish the rapid head carefully with a bigger fly, then work diligently in front of and behind the big boulder or shelf 30 feet below. You’ll see it by watching for subtle surface disturbances: a slight bulge, a slowdown, or a subtle v-wake.

    Many anglers picture long, classic runs when talking about steelhead water. Those do hold fish, but they’re a bit more complicated. Long runs are rest stops — like pulling into a gas station on a road trip. Choose runs with structure: shelves, drop-offs, color changes, boulders, or depth variation. Because long runs don’t have much happening on the surface to camouflage fish, steelhead rely more on structure itself to feel safe. Luckily, the long runs are a great way to get into a casting rhythm and enjoy the process, but with a couple key pointers: Slim down your offering, step carefully, and minimize mends. I also stay tight to the bank; alders shading water as shallow as knee-deep offer enough security for a resting fish.


    This is classic holding water on the North Umpqua. Fish can be found in soft pockets along spines of bedrock in chutes of quick-flowing water. The North Umpqua is notorious for small buckets that may hold a single fish.

    A Couple of Rules to Live By

    Here are a few key points I keep in mind when I’m swinging flies for steelhead:

    • Steelhead tend to hold in the same spots. If you get a grab behind a boulder today, odds are you’ll find action around that same boulder tomorrow. Keep a log of encounters and revisit those spots at the same time year after year. Note the date, place, conditions, time of day, and fly. Steelhead are creatures of habit.
    • Steelhead are smart but lazy. These fish are big because they were the smartest in their brood. But none of them want to sit in churning, fast, difficult water. Think about where you would rest if you were a lazy fish.
    • There is no such thing as a desperate steelhead. If the fish wanted your fly, it would have eaten it. Don’t overwork the same water or get frustrated when you don’t find a willing participant. Steelhead are challenging because they’re patient — use that as a chance to work on your own patience. Just be sure to fish each run and bucket with integrity.

    This wild buck took my fly on a long, calm run with tall alders shading the bank. The water is about two to four feet deep for about 50 yards with plenty of medium-sized boulders.

    This Is Not a Comprehensive Guide

    It takes a lifetime on the water to truly understand steelhead holding water, and I’m lightyears away from becoming a master myself. Reading water is so nuanced that one blog post could never cover the entire topic. I may break down different types of holding water in a future series, but for now, here are a few of my favorite in-depth resources:

    • Steelhead Fly Fishing — by Trey Combs
    • A Steelheader’s Way — by Lani Waller
    • The Complete Steelheader — by John Larison

    These books have shaved years off my learning curve. But as powerful as they are, there’s no substitute for time on the water.

    Catch me there, my friends.

    —T

  • Inside America’s Oldest Boat Shop: How Lowell’s Shaped Drift Boat History

    Lowell’s Boat Shop sits on the banks of the Merrimac River in Amesbury, MA.

    Ever since I picked up my copy of Roger Fletcher’s Drift Boats & River Dories, I’ve been wanting to make the journey out to Lowell’s Boat Shop in Amesbury, MA. While Fletcher doesn’t specifically discuss the shop itself, it quickly became obvious that the origins of the classic McKenzie River drift boat can be traced back to America’s oldest continuously operating boat shop.

    I became interested in Oregon’s drift boating history when I saw my first wooden drift boat float past me on the Deschutes River. Its flat bottom, high sides, and sexy sheer lines immediately caught my eye and sent me down the rabbit hole, exploring how this design came about out of necessity—pioneers sending boats through the McKenzie River’s rapids many years ago. Since then, I’ve read thousands of words on the history of these iconic vessels in hopes that one day, in my own shop, I can recreate and refine the designs that once conquered Oregon’s remote waterways.


    The main workshop upstairs is heated by a pair of old pot belly stoves.

    Lowell’s Boat Shop

    Lowell’s Boat Shop is the birthplace of the Banks-style dory. While it isn’t the boat we see punching through rapids on the McKenzie or the Deschutes today, it’s easy to spot the shared DNA with modern drift boat designs. The flat bottom, straight sides, and rugged build were all essential for riding atop waves and slipping between rocks on Oregon rivers. The original design actually derived from Simeon and Hiram Lowell’s surf dory—famous for its ability to ride over breaking waves at the mouth of the mighty Merrimac River as it empties into the Atlantic Ocean.

    A collection of old wooden dories. Each is well over a hundred years old.

    The Banks dory, which developed from that original surf dory, later incorporated straight sides and a stackable form, making it an ideal mass-produced working boat. Many of these qualities eventually became essential demands of river guides out West.

    The boat shop itself was founded in 1793 by Simeon Lowell on the banks of the Merrimac River in Amesbury, MA. As the nation’s oldest continuously operating boat shop, it pioneered a production process that made its surf dories a staple of New England’s commercial fishing fleet. In 1911, Lowell’s produced over 2,000 wooden boats—each built by hand—inside the historic timber-framed building. Despite their reputation for quality, the boats typically lasted only a handful of years against New England’s harsh coastline, making them “disposable” in the sense that they were constantly replaced.

    Today, Lowell’s still produces wooden boats but primarily functions as a museum and classroom space, preserving the craft and culture of traditional wooden boatbuilding.


    Lowell’s is an antique tool collector’s delight. Note the cast iron bandsaw and old wooden snatch blocks.

    The Building Itself

    During my visit, I was most struck by the building. The original 232-year-old structure still stands, weathered by salty air and held together by boat knees and braces. Giant timbers support a structure that seems determined to be reclaimed by the river below. The floors buckle and twist from two centuries of settling. Crossbeams bear carved annual production figures—most notably the 1911 record boasting 2,011 boats built in a single year.

    The floors are coated with what’s lovingly called “Lowell’s Linoleum”: a thick layer of marine paint drips and spills, in some places up to six inches thick. Walking across the uneven floorboards, you trip over inch-or-two variances where paint has broken away to reveal the aged timber beneath.

    Massive beams hold up the 232 year old building. Note the old boat knees repurposed as braces in some areas.

    The multi-level shop is a treasure trove of antique tools that would make any collector drool. Hammers, wooden clamps, hand-crank drills, wooden snatch blocks, cast-iron bandsaws, and rows of handplanes fill every surface. A wall of bins stocked with copper and silicon-bronze fasteners sits beside a window overlooking the Merrimac. The lower level is littered with old boats—paint peeling, wood weathered—each well over a century old. An inconspicuous latrine along the southern wall hangs over the river, its seat opening directly to the cold waters below.


    Lowell’s builds all of their boats upright. Easel-like forms attach to the overheads beams and apply downward pressure to preserve accurate curvature of the flat bottoms. the lapstrake planks on the classic wooden surf dories are riveted in place by hand.

    An Experience to Remember

    Maybe one day I’ll nerd out and write a comprehensive history of wooden drift boats in the Pacific Northwest, but Lowell’s Boat Shop felt like the right place to start. It’s a moving experience to stand in the place where drift boat design was conceived and to see 232 years of progression in the wooden relics scattered around the property.

    A spot to reflect. The view from a workbench through ancient wooden sash and trim.

    The shop is a reminder that traditional boatbuilding is accessible to anyone with a few hand tools and some know-how. You don’t need fancy machinery to build the wooden boat of your dreams. Just look at the hand saws, drills, and century-old planes and chisels lining the walls of Simeon and Hiram Lowell’s legacy shop.

    Signing off.
    –T

  • Tried-and-True Mayfly Imitations to Fill Your Fly Boxes

    Blue Winged Olive photo I found on NatureSpot.

    I’ve been doing some reading on more traditional flies, and I’m excited to fill my fly boxes with them this winter. When the weather keeps you off the water, there’s nothing quite like sitting at the vise with your favorite warm beverage in hand. This is a short list of classic mayfly patterns that act as solid general practitioners and cover most hatches you’ll encounter throughout the year.

    Mayflies

    Mayflies—Baetis included—are an incredibly diverse group of insects. I love mayflies because of this diversity and the fact that they’re present year-round in several different forms. From nymphs to dries, there’s no shortage of patterns you can dream up to imitate a mayfly on your local waters.

    Mayflies are fairly easy to identify on the water. They’re the ones with three tails and stunning, sail-like upright wings. In flight, they tend to look like they’re dancing or gently fluttering, unlike the more chaotic flight of most caddis species. Don’t get too hung up on identifying mayflies as Cinygmula, Hexagenia, Callibaetis, etc. Instead, look in your box and pick the best color and size match. A good rule of thumb is to go one size smaller than you think you need.

    Tying Up Some Bugs

    For all intents and purposes, we can group mayflies into three major categories: small, medium, and large. Small mayflies include BWOs (blue-winged olives) in sizes 18–24. Medium mayflies include sulphurs and flavs, among others, in sizes 14–18. Large mayflies include drakes and hexes in size 12 and larger.

    Most of the following patterns act as solid general practitioners for any of these categories—just adjust your sizing. I’m going to focus on dries and emergers specifically.

    Olive Dun Quill

    • Hook: Size 16 or smaller dry fly hook
    • Thread: Light olive
    • Tail: Small bunch of blue dun spade hackle fibers
    • Body: Olive-dyed quills
    • Wings: Divided pair of blue dun hen hackle tips
    • Collar: Blue dun hackle
    Palm Emerger.

    BWO Palm Emerger

    • Hook: Size 16 or smaller curved dry fly/nymph hook
    • Thread: Pale olive
    • Tail: Small bunch of wood duck flank fibers
    • Body: Olive-dyed goose or turkey biot
    • Thorax: Pale olive rabbit fur dubbing
    • Hackle: A couple turns of blue dun hen hackle

    Royal Wulff

    • Hook: Size 12 or smaller dry fly hook
    • Thread: Black
    • Tail: Small bunch of black moose body hair
    • Body: Fine peacock herl with a red floss joint
    • Wings: Divided; snowshoe hare foot, calf, or goat
    • Collar: Dark brown or furnace hackle

    Biot Drake Parachute

    (Use brown or tan materials for Brown Drakes)

    • Hook: Size 12
    • Thread: Olive
    • Tail: Bleached moose body hair or blonde elk
    • Body: Olive turkey biot
    • Wings: Webby hen neck, hen back, or blue grouse flank wrapped into a parachute post
    • Thorax: Olive rabbit fur dubbing
    • Hackle: Mixed olive-dyed grizzly and blue dun, tied parachute style
    Most mayflies end their lifecycle as a rust-colored spinner. This one is from The Perfect Fly Store.

    Red Quill Spinner

    • Hook: Size 12 or smaller dry fly hook
    • Thread: Brown or tan
    • Tail: Split white or cream spade hackle fibers
    • Body: Natural reddish-brown quills, or reddish-brown thread in smaller sizes
    • Wings: White or cream hen hackle tips tied spent
    • Thorax: Rusty brown rabbit fur dubbing

    A Note on Spinners

    Have you ever noticed that most spinner patterns in fly shops are tied beautifully, with wings perfectly perpendicular to the body? Me too—and I don’t like it.

    I recently read a book that confirmed my suspicion that spinner dries are often tied too perfectly, and I plan to adjust my tying accordingly. Spinners should look like dead bugs. That means mangled, broken, and dragged through the current. It’s worth experimenting with spinners tied with a missing or broken wing, wings set at odd angles, or even flies tied on hooks with slightly bent shanks. Try it out and see how you like it.

    Wrapping Up

    There’s no way I could write a post covering every fly for every mayfly species you’ll encounter on your local water—especially once you factor in nymphs. What I do know is that trout are less picky than we think, and it pays to get good at tying a few core patterns in a range of sizes and colors.

    Winter is the perfect time to practice tying mayflies, and it’s gratifying to know you can fish those patterns nearly year-round—at least when it comes to BWOs.

    Signing off. See you in 2026!

    —T

  • Great Fly Fishing Gifts Under $20 (Perfect for Last-Minute Shoppers)

    Wild steelhead are the greatest gift of all.

    For the budget-conscious shopper with a fly fisher in their life: it’s tough finding affordable gifts in the era of $1,000 fly rods and $200 nippers. That said, I think we can still do a damn good job with this one.

    This list is perfect for the last-minute gifter looking for stocking stuffers, cheap holiday wares, or small surprises that show your fly fisher you approve of their obsession. Without further ado, let’s get into it.

    30 Rainier Beers – I’m bringing back the deal of the century. Found at any participating PNW Costco for around $20. You can’t beat it—but you can drink them all in one sitting with the right friends (responsibly).

    Loon Classic Nippers – You can never have too many nippers. In fact, I lost a pair just a couple of weeks ago. Beat the curse and gift them a fresh set.

    Loon Rogue Forceps – These are my favorite forceps, and they haven’t done me wrong yet. They clip onto your pack and just won’t quit.

    Fishpond Swiftcurrent Thermometer – Every angler needs a thermometer in their kit. Use it to predict hatches, check water temps to gauge steelhead activity, or make sure conditions are safe for the fish.

    A Good Read from ThriftBooks – ThriftBooks offers used books at an amazing price point. Here are a few of my all-time favorites:

    Oros Strike Indicators – These are my favorite bobbers on the market because they install and uninstall easily while staying in line with the leader. Fewer tangles and excellent visibility make them an Amazon favorite. I like grabbing both fluorescent and white versions to build a hybrid indicator—half white, half fluorescent.

    Merch from Their Local Fly Shop – Support the local shop. Hats, tees, fly boxes—whatever. These always make great gifts and help keep small businesses alive.

    There Ya Have It

    By no means a comprehensive list, but I think we got pretty damn close. These are some of the best gifts you can grab quickly and easily, and they’re guaranteed to impress. Expect a similar list next year with gifts under $50 to account for inflation and tariffs.

    Until then—happy holidays.

    —T

  • In Search of Winter Water

    Seasons Greetings from the SLC Airport!

    I’m writing this post from a lounger in the Salt Lake City Airport, flanked by a magnificent 40-foot-tall Christmas tree and a small, hidden menorah. Hanukkah could use a bit more love, don’t you think?

    I was on the fence about bringing a fly rod with me on this trip to Boston. Kate and I try to go annually, almost exclusively during the winter. I’ve tried suggesting that we go when it isn’t frigid outside, but holidays with her family are worth more than decent weather. Each time I pack for this trip, I debate bringing a fly rod—knowing full well that I will likely not have a spare moment to fish. Even if I did, where would I?

    New England has a tendency to ice up during the winter, and not in a fun way. All of the ice-fishing opportunities are further west, and the open water along the coast is too cold to target any species in a meaningful way. The only exception is a warmer confluence on the Charles River that might hold some striped bass, but odds like that aren’t worth checking a bunch of fishing gear through airport security.

    I’m Very Grateful to Live in Central Oregon

    The holiday season always fills me with a sense of gratitude. I’m grateful that my family lives close by, I’m grateful for Kate making sure I stay well-stocked with common sense, and I’m especially grateful for the winter fishing opportunities that abound in Central Oregon.

    It’s all fair game around here depending on water levels and clarity. The Metolius is always the best bet for consistent winter action—at least, it’s consistent if your presentation is on point. Since it’s a spring-fed stream, the water stays a steady 40–45 degrees no matter the conditions. Fish remain relatively active despite the cold and are especially receptive to euro-nymphing tactics. Catch a winter midge or BWO hatch on the Metolius for a refreshingly good time.

    The Fall River, close to Sunriver, is another solid winter option. This spring creek flows much slower and shallower than the Met, so I recommend dry-droppers or slowly stripped streamers like the Thin Mint. Winter midge and BWO hatches also present fleeting opportunities to break up the monotony of winter nymphing.

    The Deschutes and Crooked Rivers are a bit more finicky, being tailwaters. You’d think the dams would keep them stable, but that couldn’t be further from the truth. Dam operators will open the gates during heavy rainstorms or heat spells. The heat causes snowmelt and runoff, and the increased flows quickly muddy the water. Always check flows and dam-operation schedules when fishing your local tailwaters, especially heading into spring.

    Anyhow…

    It can be tough to travel without fishing gear knowing there will be water nearby. I personally supplement the craving with a good read. Anything by John Gierach tends to scratch the itch. On this particular Delta flight, I’m taunting the rest of the economy cabin with my copy of Good Flies: Favorite Trout Patterns and How They Got That Way. John’s writing is as engaging as ever, and books like this help reset my fly-tying habits into something that (hopefully) ends up being more productive.

    I want to find a way to travel with my fly-tying kit as well—my vise, a couple essential tools, and enough materials to tie three to five key patterns. If any of you have found a way to pack fly-tying gear efficiently, please tell me. If you’ve figured out how to tie from your airline seat without pissing off your neighbor, please email me a full set of descriptive instructions. I’ll write a separate post one day about my experiences flying with tying gear—whenever I get around to trying it.

    Wrapping Up This Yarn

    Time to bring this word-vomiting session to a close. The point is that fishing is always on the mind of the passionate angler. As I’ve written before, the angler’s affliction is measured off the water just as much as it is on the banks of their favorite stretch. This pastime always has a deeper layer waiting to be uncovered. All you need to do is put in an extra two cents of effort to find it.

    Stay warm.
    —T

  • When You Can’t Fish: How to Stay Connected to the Water

    Fly tying is one of the best ways to stay in touch with your inner angler when there is no water in sight.

    This one has been hitting close to home lately. Any serious angler has gone through dry spells — literally. I’m talking about when life gets so busy that your boots go dry for not just one but maybe two weekends in a row. For a moment, you might even wonder if you’re still a religious fly fisher. You ask yourself, “Am I some kind of poser?”

    Don’t worry — you’re still the same obsessive angler who brings up fishing in every conversation, whether it’s an anecdote from a recent day on the river or an analogy inspired by yet another revelation you had while untangling your leader. I’m here to help you stay connected to your primal self, even when life is determined to pull you in every direction.


    Number One: Tie Some Flies

    We’ll start with a gimme. The easiest way to feel connected to the water is to fill your fly box. Whether you’re tying bugs for the next big trip, rounding out your caddis emergers and cripples, or cranking out your favorite jig streamer — it’s all fair game.

    If you aren’t a tyer, sort through your boxes and organize your bugs into categories that actually make sense. Heavy nymphs in one box, big attractor dries in another, all the perdigons in one place — you get the picture. Maybe go a step further and deal with the graveyard of broken hooks and stripped flies hiding in the bottom of your bag.

    Which brings me to the next one…


    Number Two: Maintain Your Gear

    This one deserves its own article, especially since most anglers don’t take nearly good enough care of their gear. Well-maintained gear is more pleasant to use — and safer on the water.

    Some simple maintenance tasks worth tackling:

    • Clean and organize your pack.
    • Clean your waders. Follow the manufacturer’s instructions and take the opportunity to patch pinhole leaks with Aquaseal.
    • Clean your fly line. This one is criminally overlooked. A great tip I picked up from Steven at The Patient Angler: take a microfiber rag, spray it with a little 303 Protectant (yes, the same stuff you use on rafts), and run your fly line through it.
    • Clean your rods and reels. Warm water and mild dish soap are all you need. Afterward, hit the moving parts on your reel with a little WD-40 to keep things dry and lubricated.

    Number Three: Plan a Trip

    This one’s a personal favorite — and you can include your spouse in the fun. Make a short list of destinations, from easy weekend escapes to full-blown, off-grid expeditions. Even if you don’t book anything, the simple act of planning keeps your imagination fired up.

    Here are a few of my current dream trips:

    • A weekend at the historic Steamboat Inn on the North Umpqua. Quality time with my fiancée and my spey rod. Does it get any better?
    • Beers and striper fishing with my buddy Mike in New England. We’ve been talking about it for years — this needs to happen.
    • A rafting and fishing trip down the Rogue River. Classed rapids, primitive camping, and world-class steelheading? Sign me up.
    • Literally any trip to eastern Canada. Paddling for brook trout, flying into a remote Atlantic salmon lodge — it’s all fair game.
    • The absolute dream: a two-week expedition through the mountains and plains of Mongolia. Unique trout, the world’s largest salmonid (the legendary taimen), nomadic yurt camps, and parts unknown — tell me that doesn’t stir your soul.

    Steelhead Water by Bob Arnold is a great read. Definitely stokes the steelhead fire in any old soul.

    Number Four: Read a Book

    There are tons of fishing-adjacent books out there — from water-soaked short stories to deeply practical how-to’s. You can’t get bored. There’s something special about sitting on the porch with a decent cup of coffee and a copy of Big Two-Hearted River or Bob Arnold’s Steelhead Water. I’ll write a separate article soon about my small but growing collection of fly-fishing literature.


    Moral of the Story

    Our obsession continues off the water because fly fishing is part of who we are. There are plenty of ways to stay connected when the weather turns cold, when you need to rest after a long week, when you’re sick, or when you just want a quiet day at home with your family.

    Simple as that: don’t let time on dry land get you down.

  • Winter Steelheading in Oregon: A Half-Assed Guide

    My buddy Lucas nymphs for winter fish on the Rogue. He uses a superrad 6wt euro rod specially made for nymphing up steelhead when a swung fly doesn’t get the job done.

    Winter fly fishing for steelhead is tough, to be honest. It’s cold, rainy, gray, and unforgiving. River levels are at the mercy of the weather and can turn unfishable in an instant. I spend my winters glued to the weather app—at least when I’m not glued to the fly-tying vise. I’ll be honest, most of my winters are spent fishing the Metolius and restocking my flies for next year, but sometimes the itch is just too much. Here is a rough guide on how to approach winter steelheading when the urge becomes too great.

    Rivers We Fish in Oregon

    In the winter, most steelheaders turn toward the coast. Everything east of the Cascades—including the Deschutes—is devoid of fresh steelhead since these rivers only get summer-run fish. We load up our trucks and head west toward the Umpqua, Alsea, Siuslaw, Siletz, and any of the north coast rivers near Tillamook Bay.

    Personally, I end up at the North Umpqua since it has about 30 miles of protected water reserved for fly fishing only. Many of the coast rivers become crowded with gear anglers excited by the possibility of bleeding out a 15-pound chrome-bright fish. Can you blame them? I tend to get nervous about my swung flies being remotely effective when competing against the Blue Fox spinners, plugs, fluorescent beads, and egg sacks saturating the local waterways. Maybe fly anglers are just jealous, and that’s why we look down on the gear guys.

    A goal of mine this year is to explore southwestern Oregon steelhead rivers a bit more seriously. My thought is that the distance from major population centers—especially Portland—will lend itself to more solitude, and hopefully more fish. I’m talking about rivers besides the legendary Rogue and Umpqua. Places like the Coos Basin, Coquille Basin, Smith River, and even as far south as the Chetco.

    When the river is blown, go do something fun with your special someone!

    River Conditions Trump Fly Choice

    Many will skim past this section to check out fly choices, but river conditions are paramount in winter steelheading. Fish get very lethargic once water temps hit the mid-40s and are unlikely to take your fly unless it’s put within a foot of their face. Literally. It’s times like these that steelhead slide into deeper, slower water that’s less conducive to swinging a fly. Combine that with an angler’s lack of control over a swinging fly (myself included) and your chances at glory are slim. Your best bet is to take advantage of brief spikes in water temperature that get the steelhead moving again.

    Rains and snowmelt have a major effect on river conditions. DO NOT TAKE THIS LIGHTLY. A big rainfall in the mountains can trigger sudden spikes in water level that become straight-up hazardous. The same can be said for sudden winter “heat waves” that melt enough snow to cause a small flood. Be mindful of both of these weather events and track your river flows religiously.

    Rain and snowmelt also affect water clarity, but I’m not so worried about that. Yes, arriving at the river to see muddy chocolate milk is unfishable, but a slight color-up is not the end of the world. Stained water just means you need to increase the size/profile of your fly and slow down your pace. Fish a bit deeper and take half-steps through the run to make sure any willing fish have a chance to see your fly. The “two big steps” rule of summer steelheading will do you no favors during the winter.

    The Misconception About Sink Tips

    Sink tips are indispensable during the winter, but you shouldn’t fish T-14 on every cast. Sink tip choice depends on water speed, water temperature, water visibility, and fly weight. It’s a lot to consider, but I’ll try to break it down.

    Most of the fishing you’ll do in 4–6 feet of water can be done on a type 3 as long as the water speed is fairly slow. Combined with a moderately weighted fly, you will get into the strike zone just fine. Remember, you only need to get within a foot or two of fish faces.

    T-8 is my go-to for most winter situations since I can adjust my depth easily using fly weight. T-8 gets me by at most water speeds and at most depths I enjoy fishing. Deeper holes warrant a slightly heavier bug, and shelves sloping up in a tailout sometimes call for an unweighted fly.

    I usually reserve T-11 and up for deep buckets with fast current barreling over the top—think the head of a rapid with a steep drop-off holding fish over six feet down. The sink tip is mostly there to cut through that top layer of raging water and give your weighted fly a chance to hit the strike zone. With the exception of a couple buckets on the North Umpqua, I tend to avoid this type of water.

    The Graboid Leech is a sweet fly. This one was tied by the creator himself — Jonathan Farmer. Check out his site Midnight Sun Custom Flies.

    The 3 Best Flies for Winter Steelheading

    Intruder — A classic winter producer. Tie it with as much variety as your imagination can come up with. I actually did an entire post dedicated to this swinging staple.
    Graboid Leech — Its beauty lies in its simplicity: a bunny strip, some dubbing, a conehead, and a trailing hook. This fly has a pushy head and some serious profile. Tie it in various sizes and colors depending on water quality.
    Hoh Boh Spey — The one I probably reach for the most. This fly does best in slightly slower runs with clearer water. Since it’s the smallest of the three, I don’t reach for it as much when steelhead only have a brief shot at seeing the fly (heads of rapids, quicker water, heavily stained water).

    Bringing It All Together

    Winter steelheading in Oregon is as challenging as it is rewarding. We have a variety of rivers to choose from, but some can be more crowded than others. Keep a close eye on the weather app and flow reports—if only for your safety—and match your fly to the conditions. Don’t let the cold weather keep you from fishing. But if it does, take advantage of the downtime to tie some flies with a glass of decent whisky to warm your soul.

    Stay warm, my friends.
    —T